Skip to product information
1 of 2

Antastic Tom

Small Nest

Small Nest

Regular price £8.99 GBP
Regular price Sale price £8.99 GBP
Sale Sold out
Taxes included. Shipping calculated at checkout.
Colour
Insert
Quantity

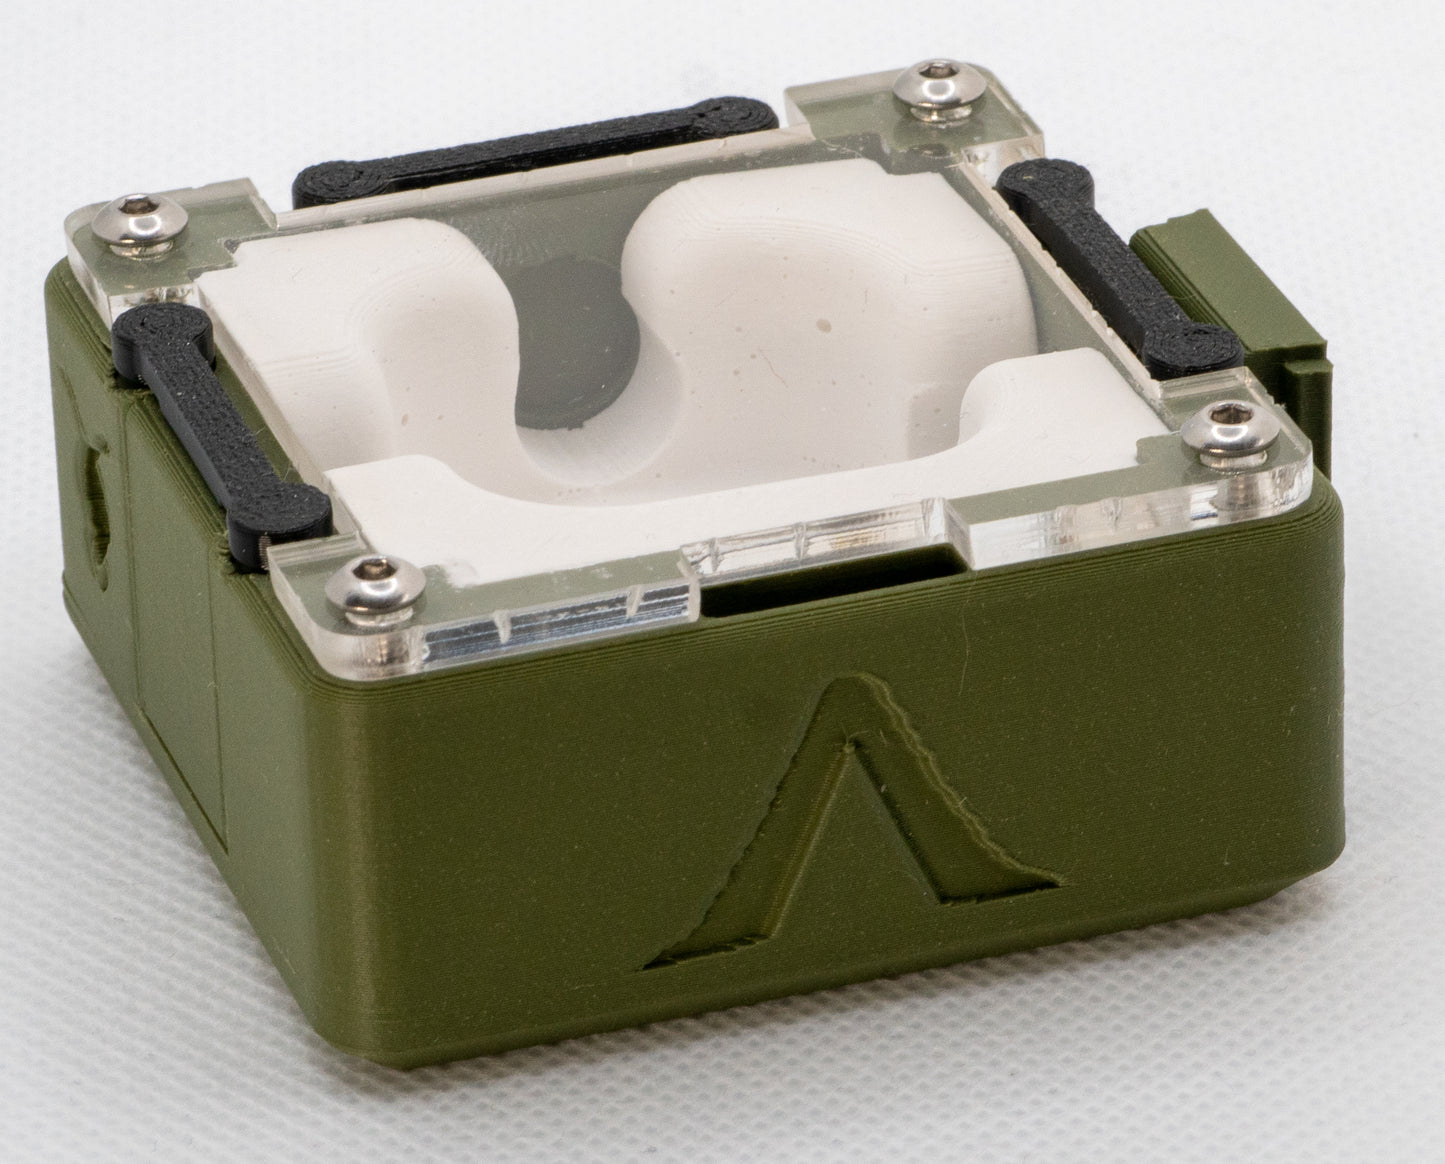
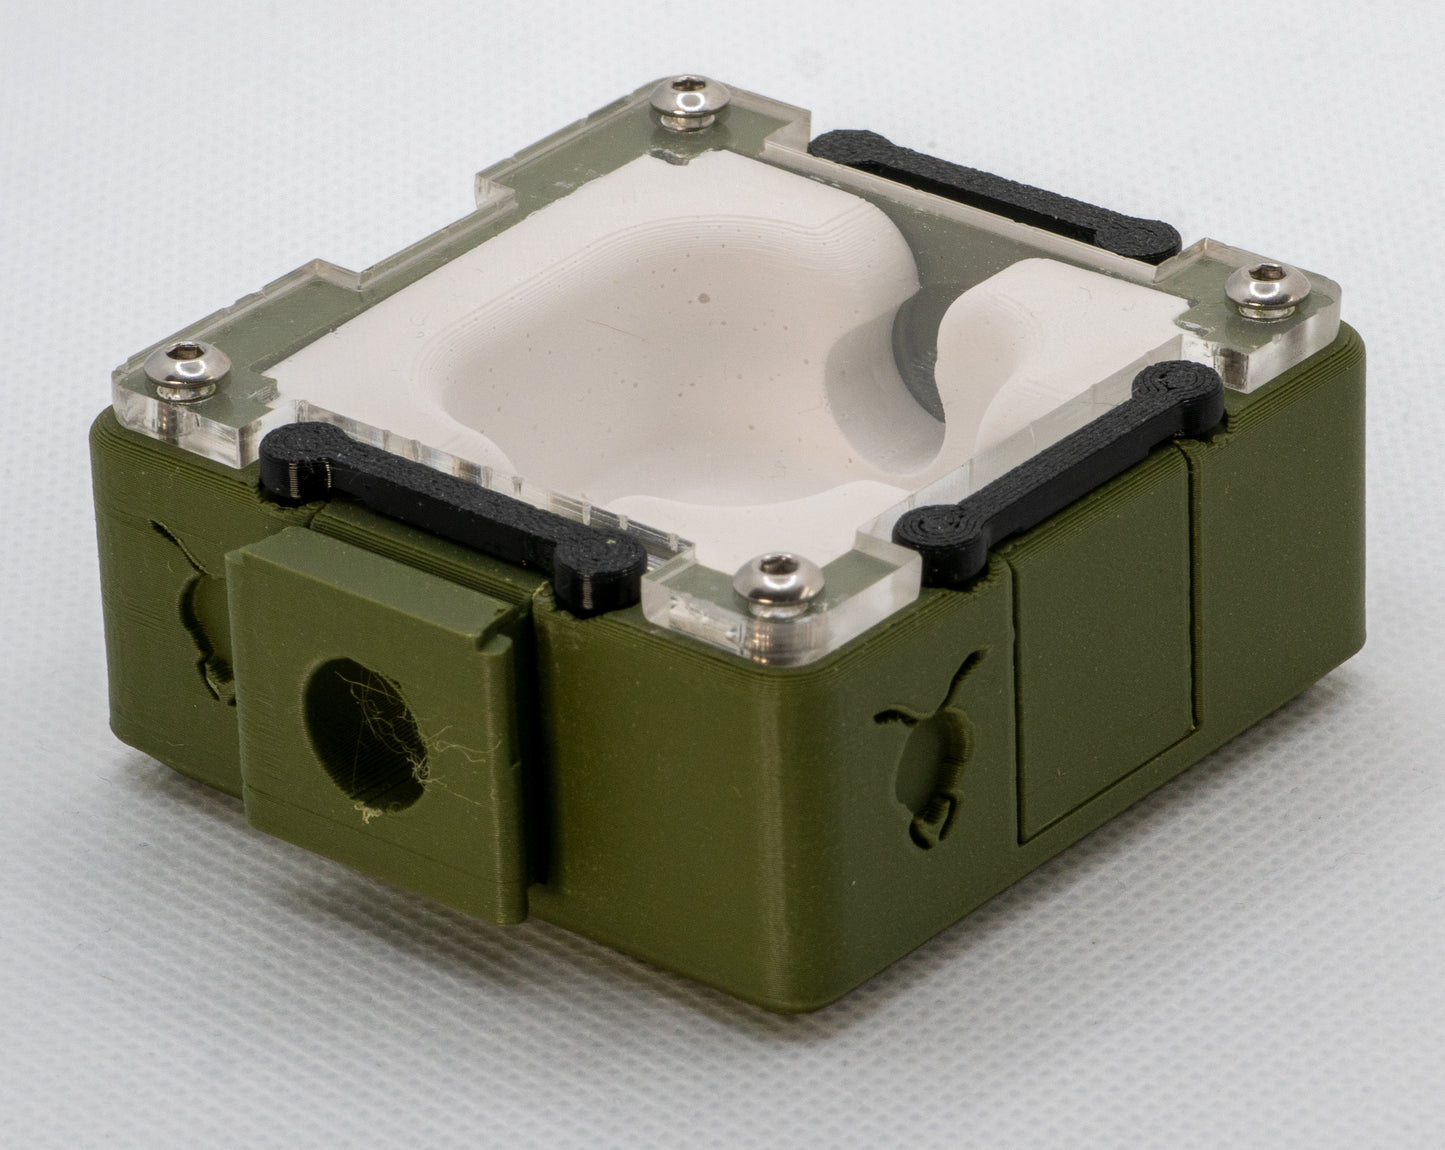
A compact modular nest designed for colonies beginning to outgrow their founding setup.

The Small Nest provides structured nesting space while maintaining the smaller, more secure environments young colonies naturally prefer.

Designed to expand gradually alongside colony growth rather than overwhelming colonies with oversized setups too early.

Best suited for:

  • Growing colonies
  • Early expansion
  • Structured brood chambers
  • Modular ecosystem growth

Compatible with:

  • Founding Pods
  • Expansion Connectors
  • Outworld systems
  • Gypsum Inserts

What’s included

What’s included

  • 1 × PLA Small Nest body
  • 1 × gypsum insert of your choice:
  • 1 × clear acrylic nest cover
  • 1 × blackout cover
  • 3 × PLA blanking connectors
  • 1 × nest-to-module PLA connector
  • 3 × TPU retention clips
  • 4 × M3 screws
  • 1 × pipette for hydration

The gypsum insert is selected when ordering. Choose the insert that best matches the size and stage of your colony.

Dimensions and compatibility

External dimensions: To be confirmed

Internal nest area: To be confirmed

Gypsum chamber depth: To be confirmed

Connector opening: To be confirmed

Materials: PLA, gypsum, TPU and clear acrylic

The Small Nest uses the Antastic Tom modular connector system and is compatible with all current Antastic Tom modular products, including compatible outworlds, founding systems and connectors.

Who it’s for

The Small Nest is designed for founding colonies and small, developing colonies that need a controlled nesting space without being moved into an oversized setup.

The correct colony stage depends on the insert selected.

Founding Insert

The Founding Insert provides a smaller and more restricted chamber area. It is best suited to:

  • Founding queens where a nest setup is specifically required
  • Queens with their first workers
  • Very small nanitic-stage colonies
  • Larger ant species whose queens require more room than a standard test tube provides
  • Colonies that need a gradual first step into a modular nest

For most fully claustral queens, a secure test-tube setup remains the preferred founding environment. The Founding Insert should only be used where a nest is genuinely beneficial or necessary.

Standard Insert

The Standard Insert provides more usable chamber space. It is best suited to:

  • Small established colonies from approximately 20 workers
  • Colonies that have begun to outgrow a test tube or Founding Pod
  • Larger species that need more space at an earlier stage
  • Multi-queen founding groups where the Founding Insert would be too restrictive

Worker numbers are a guide rather than a strict rule. The size of the ants, the amount of brood and how much space the colony currently occupies should also be considered.

Setup and use

  1. Check the gypsum insert for loose dust or debris before assembly. A soft, dry brush can be used if necessary.
  2. Gently lower the gypsum insert into the PLA nest body. Do not force or twist it into position, as gypsum can chip if placed under pressure.
  3. Position the clear acrylic cover over the nest.
  4. Insert the four M3 screws and tighten them evenly. Tighten only until the acrylic is held securely. Overtightening may crack the acrylic, damage the gypsum or distort the PLA body.
  5. Fit the three blanking connectors into any unused ports.
  6. Attach the nest-to-module connector to the port that will connect to the colony’s outworld, test tube or other Antastic Tom module.
  7. Insert the TPU retention clips into the upper slots of the connectors. These help prevent the connectors from being pulled out accidentally.
  8. Using the supplied pipette, slowly add approximately 2 ml of water to the nest hydration point.
  9. Allow the water to absorb into the gypsum before introducing the colony. Check that no standing water has entered the chambers.
  10. Fit the blackout cover over the nesting area and connect the nest securely to the rest of the setup.

Allow the ants to move into the nest naturally. Do not shake, tip or force the colony from its existing test tube or module.

Care and maintenance

  1. Check the gypsum insert for loose dust or debris before assembly. A soft, dry brush can be used if necessary.
  2. Gently lower the gypsum insert into the PLA nest body. Do not force or twist it into position, as gypsum can chip if placed under pressure.
  3. Position the clear acrylic cover over the nest.
  4. Insert the four M3 screws and tighten them evenly. Tighten only until the acrylic is held securely. Overtightening may crack the acrylic, damage the gypsum or distort the PLA body.
  5. Fit the three blanking connectors into any unused ports.
  6. Attach the nest-to-module connector to the port that will connect to the colony’s outworld, test tube or other Antastic Tom module.
  7. Insert the TPU retention clips into the upper slots of the connectors. These help prevent the connectors from being pulled out accidentally.
  8. Using the supplied pipette, slowly add approximately 2 ml of water to the nest hydration point.
  9. Allow the water to absorb into the gypsum before introducing the colony. Check that no standing water has entered the chambers.
  10. Fit the blackout cover over the nesting area and connect the nest securely to the rest of the setup.

Allow the ants to move into the nest naturally. Do not shake, tip or force the colony from its existing test tube or module.

Frequently asked questions

Which insert should I choose?

Choose the Founding Insert for a founding queen, a queen with her first workers or a very small colony that needs restricted chamber space.

Choose the Standard Insert for a more established colony, generally from around 20 workers, or for larger species and multi-queen groups that need more room.

Can I use the Small Nest for a queen without workers?

Yes, when using the Founding Insert, but only where a nest is appropriate for that queen. Most fully claustral queens are still best left in a secure test-tube setup until their first workers arrive.

Semi-claustral queens, larger species or unusual founding groups may benefit from a nest setup earlier.

How many workers can the nest hold?

There is no exact number because ant species vary considerably in body size and nesting behaviour.

The Founding Insert is intended for founding and nanitic-stage colonies. The Standard Insert is generally suitable from approximately 20 workers and can support the colony until the chamber space begins to feel consistently occupied.

How often should I hydrate the nest?

There is no fixed schedule. Hydration depends on the species, temperature, ventilation and room conditions.

Check the gypsum regularly and add water gradually when it begins to dry. Avoid hydrating automatically on a set day if the insert is still visibly damp.

How much water should I add?

Use approximately 2 ml for the initial hydration, added slowly through the hydration point.

For later hydration, add smaller amounts gradually and observe how quickly the gypsum absorbs the water. Stop if the insert becomes heavily saturated or water begins entering the chambers.

Should I feed the ants inside the nest?

No. Food should be offered in a connected outworld or feeding module. Feeding inside the nest can increase waste, mould and mites in an area that is difficult to clean while occupied.

Do I need to use the blackout cover?

The blackout cover is strongly recommended. It keeps the nesting chambers darker and reduces disturbance while still allowing you to remove the cover briefly for observation.

Some colonies tolerate light better than others, but providing darkness gives the ants the choice of a more secure nesting environment.

How do I move the colony into the nest?

Connect their current test tube to a founding pod (sold
separately) or test tube connector (sold
separately) to the nest and allow them to move naturally.

Hydrate the nest, fit the blackout cover and leave the existing test tube exposed to normal room light if necessary. Do not shake or pour the ants into the nest.

What are the TPU retention clips for?

The clips fit into the upper slots of the modular connection points. They help hold the connectors securely and reduce the risk of a connector being pulled out accidentally.

Is the Small Nest escape-proof?

It is designed to close securely when correctly assembled, but no ant setup should be treated as automatically escape-proof.

Before introducing ants, check:


  • The acrylic cover

  • All four screws

  • The blanking connectors

  • The nest-to-module connector

  • The TPU retention clips

  • Every connection to another module

Can I connect the nest to other Antastic Tom products?

Yes. The Small Nest uses the current Antastic Tom modular connector system and can connect to compatible outworlds, Founding Pods, test-tube systems and other modular products.

Can the gypsum insert be replaced?

Yes. The removable insert can be taken out when the nest is empty and replaced if it becomes damaged, heavily contaminated or no longer suitable for the colony.

Is staining on the gypsum normal?

Some staining and discolouration are normal because gypsum is porous and absorbs moisture. Dark marks do not automatically mean the insert is mouldy.

Persistent spreading mould, unpleasant odours or contamination that cannot be removed are signs that the insert may need replacing.

View full details